
Interested in creating a beautiful DIY mud kitchen for your child that doesn’t require a lot of time, money or skill? With a few sturdy logs, some repurposed containers, and natural materials from our garden, we created a simple DIY outdoor mud kitchen for no additional expense.
In this guide, I’ll show you exactly how we made and stocked our own natural DIY mud kitchen, for free, to the delight of our three young children.
Can You Make a Mud Kitchen for Free?
One of the reasons I hesitated on pulling the trigger on a mud kitchen was that I’d internalized the idea that they required either a lot of money to buy, or a lot of knowledge and skill to DIY.
I must have read and saved dozens of how-to guides for building a mud kitchen. But, after pricing out the materials, I found that many of the DIY options came surprisingly close to retail prices. Perhaps the numbers worked out a little better in America.
Still, I wasn’t confident enough in my skills to take on the project myself. With my third little one soon to arrive, and twins under two years old, I hesitated. Others had offered to build us one, but those offers never quite came to fruition.
So I waited. And now, with three children aged three and under, I decided it was time to build them a mud kitchen using the simplest, most frugal means I could.

Why We Love Our Montessori Mud Kitchen
I have such fond memories of making backyard soup as a child. That was any collection of whatever was at hand, including Catalpa tree green bean pods and (likely poisonous) berries stirred together in plastic bucket with decorative white stones for seasoning. I think most of us carry memories of playing in the mud, collecting natural materials, and imagining we were thoughtfully preparing a meal.
I wanted to provide an intentional space for my children to experience the same. A mud kitchen fosters creativity and natural imaginative play with the many benefits of simply being outdoors. I love watching my children criss-crossing between collaborative and parallel play. The ideas of one child serving as a jumping off point for the others as they explore new techniques and new recipes with a rotating choice of ingredients.
Finally, I love how they beam with pride as they gift me with their creation.

How to Set Up a Mud Kitchen

1. Building Your Work Station
Start with a relatively level spot in your garden. Somewhere shaded during the hours your children are most likely to play. Ideally, your mud kitchen should sit on flat, relatively level ground. The counter sits at elbow height, where they can complete their work without climbing or stretching precariously. A sturdy work station for little hands to comfortably pour, chop, and mix ingredients for their earthy creations.
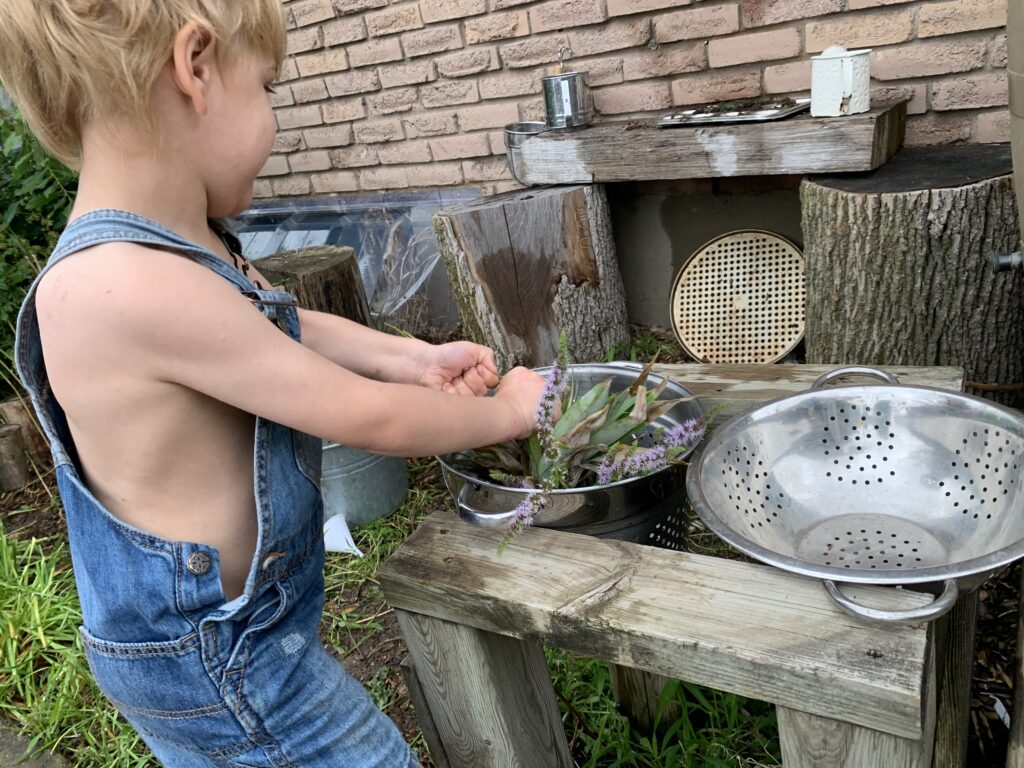
Ours is made from two sturdy stumps for the base, with a long, vertically cut log split and laid across the top to create a generous prep surface. With three young children, having enough elbow room to sidestep frustrations was always on my mind.

We set aside another log to serve as a cooking station, and I repurposed an old rain barrel stand as a spot for rinsing and washing. Keeping these activities in distinct areas gives the children more opportunities to move between preparing, cooking, and cleaning up.
I was lucky enough to come across a recently cut down tree from someone’s front yard. After asking the home owner, they were happy for me take as much as I wanted, free. The rain barrel, bucket and wooden stand were also curbside finds. Early spring and fall are great times to keep an eye out for curbside or free second-hand finds as people are clearing up their yards after and before the winter.
If you’re building your own mud kitchen using pallets or reclaimed wood, it’s important to know the history of the materials. It’s tempting just to scoop one up from the curb, but it’s important to consider potential chemical treatment, contamination, splintered edges, and exposed nails in the wood.
Personally, I had enough on my mental load already, so I took a simpler route. Honestly I think the wood in its most natural state has the greater visual impact. Our mud kitchen blends nicely into the garden with lots of small details like bug trails and growth rings for visual interest.
2. How to Stock a Mud Kitchen for Free
There are many ways to stock a mud kitchen, from outright free to very cheaply. In fact, some of the best tools are things you already have at home.
Start with a few essentials: bowls, pots, spoons, scoops. Only add pieces as you discover what your children enjoy using most, and what holds up best in your yard.
It’s tempting to fill a mud kitchen with choice, but a smaller collection will encourage more creative play. Here are your three best sources for getting started…

Shop your own kitchen drawers (Free)
I always cringed when DIYers would claim something was “free” simply because they already had it on hand, as though leftover chalk paint or epoxy resin were sitting in everyone’s cupboards. But when it comes to kitchen surplus, I think most of us actually do.
We all have those “just in case” utensils and hand gadgets tucked away in drawers that rarely (if ever) will get used. Old mixing bowls, wooden spoons, measuring cups, awkwardly stored baking tins, and even pots left over from households merging. I think we were up to four sets of measuring cups. Unlike leftover hobby supplies, I felt these well worn tools had given us their money’s worth. Still, afraid of being wasteful, I held onto them just in case we might find a use for them someday.
Well, we’ve found the perfect use!
Repurpose your recycling (Free)
I like to look for items that will offer different ways to play: something to scoop with, something to pour into, something to mix with, and something used as a container. This is easily achieved with recyclables.
Yogurt pots make handy potion pots, fruit containers can hold collections of ingredients, disposable chopsticks can be used for stirring, and clear milk jugs can be repurposed into pouring containers without spending an extra penny.
You don’t even need to expend your own mental energy planning everything out for your kids. Just hand them a box of clean recyclables (no glass or sharp cans) and see what they come up with.
Replace anything that becomes cracked or damaged guilt free that you haven’t spent extra money on them in the first place.
Visit thrift stores (Cheap)
If you feel like stepping outside the strict expectation of creating a free DIY mud kitchen, the thrift store is an obvious choice for a large variety of cheap utensils, cookware, and cooking gadgets. You can read my post on finding beautiful thrifted treasures for the Montessori home.
It’s an especially good choice for more unusual gadgets like a potato ricer, apple peelers, tea strainers, and hand-cranked beaters. I just love walking the aisles and thinking, I wonder what they’ll make of this.
It’s also a fantastic place to find plastic totes or laundry baskets for storing your mud kitchen supplies when not in use.
Choosing Durable Materials for an Outdoor Mud Kitchen
We learned through trial and error what materials hold up best in the harsh outdoors. Metal baking dishes or pans made from untreated iron and ordinary steel will rust in wet conditions. Wooden handles will swell and mould. Glass was just an obvious NO. Instead, a lot of our mud kitchen cookware are stainless steel for better rust resistance.
Colourful silicone cooking tools stand up well to harsh conditions, are lighter, and don’t rust. This is what our children’s gardening tools are made of. A punch of colour not only adds whimsy, but is practically speaking a great choice for a muddy space. While keeping everything earth tones can be aesthetically pleasing, tools can easily disappear forever into the brush.
Even the best of materials are going to break down from vigorous play out in the yard. Our handheld flour sifter, for instance, couldn’t keep up with our twins’ culinary needs and kept jamming with overuse. Most days, clean-up involves everything getting a good rinse and a once-over for sharp edges or choking hazards. You might just space this out to a weekly check.
3. Gathering Ingredients Grown in Our Garden
Flowers
- Geraniums
- Nasturtiums
- Bee Balm
- Squash Blossoms
Earthy Materials
- Tree bark
- Sticks
- Mulch
- Straw
- Pussy willow
Just as there is seasonal availability in our grocery stores, children will discover that what is available in their mud kitchen pantry will change with the seasons.
This patch of earth used to be a tomato garden. I let the perennial chives and cilantro run wild as easy to pick pot fillers. In the spring and fall the chive flowers and the cilantro flourishes. In the hotter summer months, both die back, allowing flowering weeds to take over.
All useful ingredients at different times of the year.

Pizza Stew, apparently
4. Foraging Free Seasonal Ingredients
We are lucky to have a few patches of earth in our mostly paved backyard for our little ones to grow and harvest ingredients for their mud kitchen. If you don’t have much growing space, or just want to expand the menu, this is my advice.
One of the easiest options for limited growing space is to choose fast growing, self-seeding herbs for planters or pots. Even small potted chives, mint, or other hardy herbs can provide plenty of material for picking. Most will even flower, adding more culinary material.
When we walk the neighbourhood, we always bring a bag. Thanks to stocking our diy sensory bins and diy mud kitchen, I have a thorough mental map of the treasures in our neighbourhood.

One of the loveliest things about using natural ingredients is watching the mud kitchen menu change with the seasons. Rather than trying to keep the mud kitchen cupboards consistently stocked, we just embrace seasonal offerings as they come. Spring might bring cherry blossoms and dandelions, while fall provides a more muted but still colourful selection of leaves, seed pods, and acorns.
Just like a real kitchen, their outdoor pantry has changed with the seasons.

Cultivating A Safer Mud Kitchen For Preschoolers To Play
One of the loveliest things about a mud kitchen is how freely children can explore the natural world and experiment with materials that change with the seasons.
With very young children, though, a little preparation goes a long way. Risk is an important factor in learning, but freedom within limits ensures that risk is age appropriate. Careful thought in preparing the environment, just as you would play spaces inside your home, allows children to safely explore with as much independence as possible.
Grow Toddler-Safe Ingredients
Our mud kitchen sits in our Montessori Sensory Garden, a space filled with plants and materials inviting touch, smell, and taste. I cultivated a space where they can explore nature without me worrying what plants they might put in their mouth. All plants are non-toxic, with lots of tasty herbs and produce to experiment with.
Scan your space for poisonous plants like certain flowers, berries, and mushrooms. If you can’t remove them, make sure your child knows what is not play material. Sometimes these just pop up overnight, like sharp spiky weeds or wild animal waste, so it’s worth a look over each day.
We find lots of interesting natural materials on our walks to stock their ‘spice cabinet’, but I still double-check what has been collected.

Keeping Water Supply Safe and Hygienic
Water is your mud kitchen’s key ingredient. Pouring, mixing, and scooping would get quite dull without it.
We used an old rain barrel (free curbside find), and a bucket for collecting and carrying water. My children thrive with heavy work, and enjoy the extra carrying, lifting and pouring. I eventually added a tap to the rain barrel, but keep the water inside regularly refreshed.
Importantly, this rain barrel has a narrow slot at the top, preventing anyone from climbing inside. Of course even a small amount of water can present a drowning hazard, so I’m always present in the yard with them when they are playing in their mud kitchen.
For our family, a running water supply would turn a mud kitchen into a swamp kitchen every time. Having a measured allowance of water also means they pour more carefully and waste less. Leftover standing water is dumped from pots and containers after we finish playing. Helps keep away mosquitoes too.
Providing Shade and Shelter
This is an often overlooked consideration. It probably seemed obvious to you reading the heading, but perhaps wouldn’t have come to mind without mentioning.
Much like going to the park on a hot summer day, you may forget the slides are going to be hot and the kids should have worn pants until they are about to go down the slide. Likewise, metal handles and muffin tins can get quite hot when left in the sun. Children can also get burned standing in one small space at their mud kitchen dutifully preparing their meal.
If you live in the Northern Hemisphere, a north or east-facing area is usually the best side of your property to provide shade. Otherwise, consider the shade from surrounding buildings and trees during the time of day your children will be most active on their mud kitchen.
We learned this lesson setting up an outdoors baby swing that could only be used before 9am and after 7pm in the summer without roasting her.
Mud Kitchen Quick Cleanup and Storage
Part of translating play to practical life skills is building in good habits. Ever walked into a messy kitchen, and found yourself walking away with no idea where to start? No counterspace and no idea how to find the tools or ingredients you need?
Even in a mud kitchen, everything should have a resting place. We screwed hooks to the log table legs for spoons and ladles to hang from. That way, they are within reach as needed and kept off the preparation surface when space gets tight.
Milk crates are excellent for storing pots and pans without pooling rain water inside. Old, plastic laundry bins are great too and may be easier to source. Its also a faster clean up to simply toss items into their respective bins.
Leftover produce or yard scraps are composted before we go inside. They can harvest fresh ingredients the next day. And all standing water is tipped out to prevent mosquitoes from multiplying or other nasty surprises. We then go inside and immediately wash our hands, or more likely shower after a good day’s work in the mud kitchen.
This routine closes out the activity in a predictable way the children can count on, and for the most part enjoy too.